Do you have an orchid that you’re struggling to keep alive? Or maybe you’re thinking about getting a new orchid plant but you’re not sure if you can handle the care requirements. Don’t worry, we’ve got you covered! In this blog post, we will discuss the basics of orchid care so that both new and experienced plant parents can enjoy growing orchids.
Orchids grow delicious vanilla beans
Before we dive into caring for orchids, we want to point out that it may surprise you to learn that vanilla bean pods come from an orchid plant. In fact, the vanilla orchid (Vanilla planifolia) is the only orchid that produces edible fruit. Vanilla is one of the most popular food flavors by far, and for good reason – it’s delicious!
Real natural vanilla is the product of a rare orchid plant, and the common flavor of our favorite food comes from the extract of vanilla orchid seed pods. This rarity is why natural vanilla is one of the most costly spices available.
So there you have it! Not only does the orchid plant produce some of the most beautiful flowers you will ever see, but it can also produce amazing vanilla.
The misconception of growing orchids
If you’re like most people, you probably think of orchids, as fragile plants with stunning flowers, and delicate petals. Also that the orchid plant themselves are high-maintenance, and require a greenhouse and a tremendous amount of care and attention.
While it’s partially true that some varieties of orchid species can require additional care to insure that they flower, it’s not true that you need to be a certified orchid enthusiast to care for them or that they are difficult plants to keep happy, healthy. Best of all, they often bloom if well taken care of and given the appropriate nutrients.
In my experience with most of my treasured plants, once you know and understand how to care for them, the fear of you being responsible for their demise will soon dissipate and their routines will become second nature to you. So rest assured, taking care of orchids is not a complicated science. You will become a master of all orchids before you know it!
In this blog about orchids, we will discuss the basic “do’s and don’ts” of growing orchids.
So whether you are a new plant parent looking for advice on how to care for your new orchid plant or an experienced orchid plant enthusiast looking for a good read, we hope to provide you with meaningful information to empower you with the ability to care for these beautiful orchid plants for years to come!
The impact of the orchids on history, art, and culture
Orchids have a long history and have long occupied a special place in human culture. Based on a study in the scientific journal Nature, it is hypothesized that the origin of orchids goes back as far as 15-20 million years ago.
In the early 17th century, the orchid flower was an important symbol of respect and admiration in Japanese culture. Orchids became very admired in Japan and growing them was sometimes considered a noble art form. In particular, dendrobium orchids were grown by Japanese royalty for their fragrance and beauty.
Orchids were also known as symbols of beauty, harmony, elegance, and luxury during the Victorian era in England. As Europeans explored and colonized the tropics, they discovered many new species of orchids. When they brought native tropical orchids back to England, many people became fascinated by the orchid’s variety of unique blooms.
The ancient Greeks also associated orchids with fertility and thought that a parent who ingested the orchid root could determine the gender of a child.
The art world also had a deep appreciation and fascination for orchids. In fact many famous paintings around the world to this day feature orchids as the main subject.
Orchids can be found in nearly every climate, all over the world.
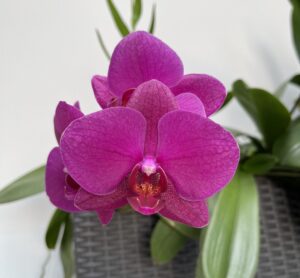
Orchid plants are one of the two largest families of flowering plants on this planet. In the wild, there are over 28,000 different recognized orchid species in the Orchidaceae family. Among the many species, some of my special favorites include the phalaenopsis orchids, the cattleyas, and the vanilla variety of course! Orchid species have evolved and adapted over millions of years to grow in a diverse range of different environments.
This climate diversity ranges from most of our planet’s moisture and nutrients rich tropical and arid rainforests in South America, to mountaintop-covered cloud forests of Costa Rica, to the deserts of Saudi Arabia and east Africa (Yes, I know, the desert! What?).
Note:
While orchid plants can be found in a variety of different habitats in nature, it’s true that the majority of the orchid species prefer an environment fair amount of humidity with plenty of bright light, like Florida, for example.
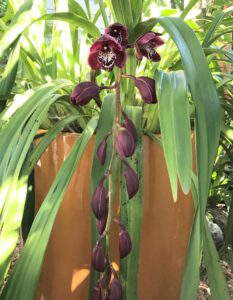
Top six different types of commonly found orchid species with stunning flowers:
- Phalaenopsis orchid
- Cattleya orchid
- Vanda orchid
- Cymbidiums orchid
- Dendrobium orchid
- Oncidium orchid
Understanding and Caring for Orchids
“Orchids are delicate, there is no way they withstand full sun”, right?
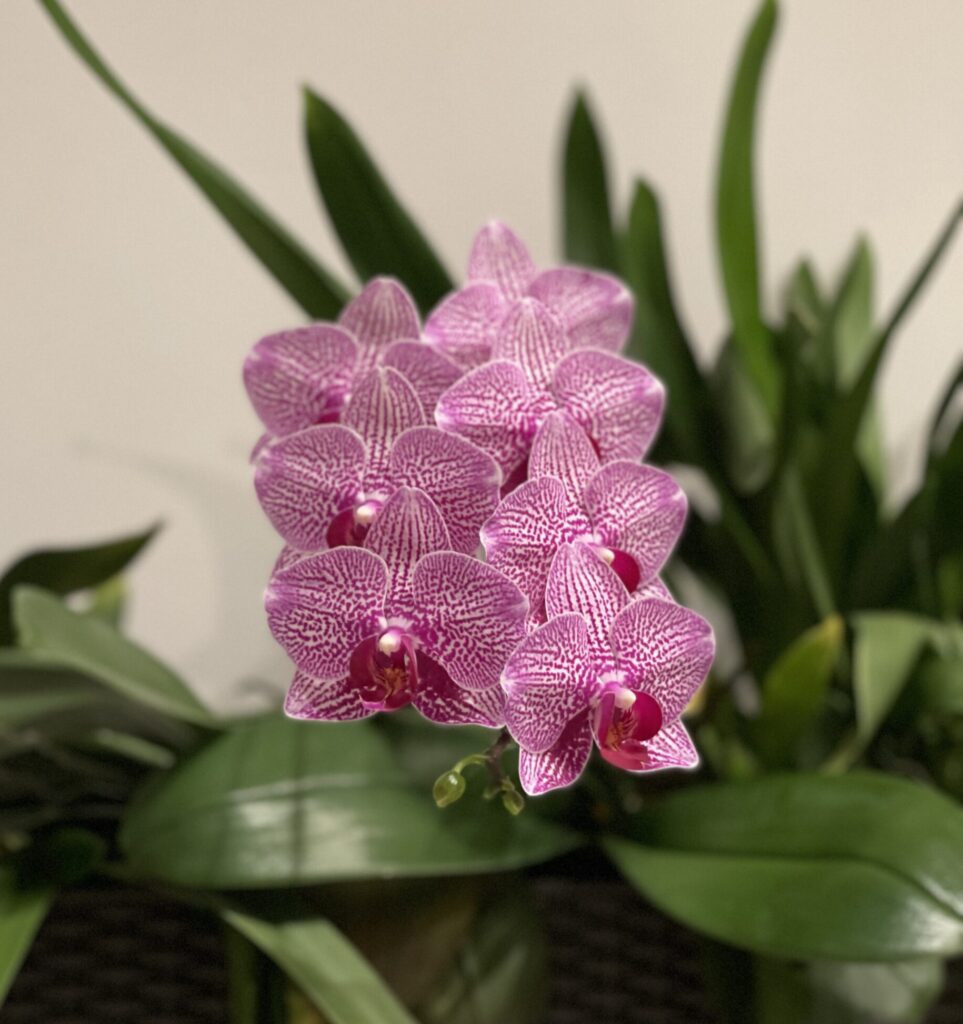
In recent years Orchid flowers have become one of the most recognizable flowers in the world. Primarily speaking, the flower of the Phalaenopsis orchid plant, also known as the moth orchid due to the wing-like shape of these orchid flower petals, has drawn a lot of attention among plant collectors. Few flowers have captivated us with their grace, beauty, and added culture like the Phalaenopsis orchid.
This plant’s stature has come with good reason, Orchids are much easier to care for than they initially appear. Also, the natural beauty of the orchid flowers come in a variety of fun colors, shapes, sizes, and fragrance.
The most common questions orchid enthusiast are asked are
- How much humidity do orchids really need?
- How much light do healthy orchids need to flower or at least be grown successfully?
The answer, like with most things related to the science behind orchids and most tropical plants alike, is: well, it depends.
Orchid care: The lighting
A general rule of thumb is that most Orchids prefer to be bathed in bright, indirect lighting. So it is best to place your orchid near a bright window where it will receive plenty of natural sunlight without being in direct sun.
Without proper lighting, you can expect your orchid to produce an abundance of lush green leaf growth, but will most likely never produce any flowers.
Secondly, and possibly an even less desirable scenario, is for the leaves to turn yellow due to a lack of natural light (Aka, starvation). Insufficient light is the most common reason for an orchid’s failure to flower. Considering that in the wild, most epiphytic Orchids thrive under bright natural light, while growing alongside other tropical plants on the branches and tree trunks protected by the forest canopy, lighting has to be cautiously studied in your environment to provide the best possible outcome for your orchids. Direct, hot sunlight can burn most orchid leaves causing them to turn yellow, brown, and even black.
In summary, orchids prefer bright, indirect natural light. An east-facing or south-facing window is ideal for growing orchids. With a few exceptions, some orchid varieties may do well in direct sunlight, but most will prefer indirect sunlight and shady locations.
Note:
You can carefully test how much light your orchid plants need by testing it in different areas of your home and seeing which spot results in the best growth. If your orchid starts to lose the natural color in the leaves or looks like it’s wilting, then it is probably in a low-light area; if it starts growing new leaves and no blooms, then it could be receiving too much light.
Orchid care: What about the potting medium and when to re-pot my Orchids?
To re-pot or not to re-pot, that is the question.
Most of the orchids that you will find at your local nurseries, big box stores, and even one of my favorite spots, Trader Joe’s will be epiphytes. Epiphytes are a group of plants that grow on the trunks and branches of trees and other plants without harming them.
These types of orchids and plants typically have strong porous roots that not only absorb moister, nutrients, and water from their environment but also use these roots to anchor or stabilize themselves onto their host.
Epiphytic plants generally require a porous, arid potting mix that will not retain water allowing for great drainage and proper airflow.
As we mentioned before, orchids come from all over the world and can be found in a variety of habitats. As a result, they come in all shapes and sizes. When it comes to potting orchids, there is no one-size-fits-all approach. The type of pot you use will depend on the size and type of orchid you have. Most orchids do best in pots that are only slightly larger than their root ball, as this allows their roots to stay moist without becoming waterlogged. clay pots are often used for orchids because they help to keep the roots cool and dry out quickly after watering.
Note:
If your potting medium retains too much water, it will harm your orchid plant.
How do you know when to re-pot your orchid plant?
Orchid roots prefer to be hugged or snuggled in their container, in other words slightly rootbound. My experience growing orchid plants has taught me that they will grow happily without re-potting for quite a few years. I tend to re-pot my orchids every 3-5 years, this is primarily to maintain a healthy potting medium and to contain the rogue roots that have wandered past the edge of their container.
Time to re-pot
Step 1: Choose the Right Potting Medium
Orchids prefer to be potted in a moist but well-draining potting mix. You can buy the orchid potting mix at your local garden center or make your own by combining equal parts of sphagnum moss, perlite, and bark chips or shredded coconut husks. Be sure to avoid using a general medium, soil from your garden or from outdoor plants as it will most likely be too dense and will retain too much water.
Step 2: Remove your Orchid plant from its current container
Carefully remove your orchid plant from its current pot by gently pushing up on the root ball from below until the plant pops out. If the roots are tightly coiled around the inside of the pot, you can carefully loosen them. You may also need to gently break apart the root ball if it is compacted or matted.
Step 3: Plant your orchid
Next, partially fill the bottom of your container with potting medium, then place the orchid in the container, and backfill with potting medium. Insure your orchid is well secured into its new container by lightly pressing on the top of the soil.
Step 4: Water your orchid
Lastly, water your orchid into place by following the directions listed below:
Orchid care: Simplified Steps
- Choose the right potting medium
- Remove orchid from current pot
- Gently break apart the root ball if it is compacted or matted
- Place the orchid in the new pot
- Fill in around roots with potting mix
- Water well and allow to drain
- Place in bright, indirect light
Now that you know how to repot an orchid, you can give your plant the best chance at thriving.
Orchid maintenance: What about the watering schedule for my Orchids?
Two proven ways to water orchid plants.
Watering orchids is pretty simple, it is best to water your orchids when the top layer of potting medium feels dry to the touch. Its recommended to use reverse osmosis or distilled water when possible to avoid drenching your orchid roots and soil medium in chlorine or chemicals.
How to water your orchid plant
- While holding your orchid pot over a sink or bucket, slowly pour or run water over the potting medium until it runs out of the pot’s drainage holes. After watering allow the water to completely drain before returning it back to its home.
- Another option is to place the orchid pot in a closed sink or bucket, and slowly pour or run water through the potting medium until the water reaches approximately halfway up the orchid’s pot. Allow the orchid to sit in the water for around 30 minutes, then slowly lift the orchid pot out of the water and let completely drain before returning it back to its home.
With either option be mindful not to overwater your orchids, if you are in doubt wait a few days before watering as they really don’t like soggy soil. If you live in a place like Florida and your home has sufficient humidity, your orchid roots will be able to pull some moisture out of the air.
Note:
If distilled water is not available, fill an open container with tap water and leave it on the counter overnight, this will give enough time for the chlorine to evaporate from the tap water.
Orchid care: The Fertilizer
Do orchids need to be fertilized to flower?
Fertilizing orchids is not only a necessary part of orchid care, it is also an easy and straightforward step to ensuring they produce flowers. There are two main types of orchid fertilizer: liquid and solid.
Liquid fertilizers are water-soluble and come in either a concentrate or ready-to-use form. Most orchid growers prefer to use liquid fertilizers because they are easier to mix with water and can be applied directly to the orchid plant’s roots.
Solid orchid fertilizers usually come in the form of tablets, granules, or powders that need to be mixed with water before being used. While solid fertilizers are not as popular as liquid ones, they do have some advantages, such as being less likely to burn the roots and being more economical in the long run.
No matter which type of orchid fertilizer you choose, there are a few basic guidelines that should always be followed:
– Fertilize only when the plant is actively growing
– Follow the directions on the package carefully – too much fertilizer can damage plants
– Fertilize your orchids regularly for best results – weekly or biweekly application is usually recommended
Orchid care: The flowers
Encouraging your orchid to bloom
Now that we’ve covered the basics of orchid care, let’s talk about how to get your orchid to bloom. While the blooming process will vary depending on the type of orchid you have, there are a few general tips that will help.
- Make sure your orchid is getting enough light. Orchids need bright, indirect light in order to bloom, so be sure to place yours near a window where it will get plenty of light without being in direct sun.
- Keep your orchid evenly moist but not waterlogged. Water your orchid once a week, or more often if it is in a particularly hot or dry environment.
- Fertilize your orchid regularly with a fertilizer designed for orchids. With proper care, your orchid should bloom within six to eight weeks!
Orchids are one of the easiest plants to grow indoors and no greenhouse is needed.
Like all plants orchids do have some minimum requirements in order to thrive in your home!
- Orchids need moderate to bright natural light
- Adequate humidity so they can pull moisture from the air
- They also prefer to be pot-bound (keep in mind that it is important not to overpot them.)
With proper care, your orchid will thrive and bloom for many years to come!
With just a little bit of care, your orchid will be happy, beautiful and enjoy long-lasting health for many years to come! Thanks for reading, and we hope this blog about orchids was a helpful guide for you. If you have any further questions about orchid care, feel free to contact us or visit our website for more information on orchids.