Tools and supplies that you will need:

- A board at least 8″x8″
- Fishing line or wire
- Drill
- Hammer
- Screws or nails
- Sheet Moss or cotton cheesecloth
- Sphagnum moss
Summary of steps
Further below in this article, we will provide you with detailed instructions along with photos to help you throughout the process. The instructions we provide can be summarized as follows:
- Find a good location on your walls that is in indirect light
- Selecting a board that is sturdy and large enough to handle the plant for years to come
- Prep the board by drilling holes for wires to secure your staghorn in place
- Prep the roots by getting rid of excess soil and wrap them together in a ball with a cheesecloth
- Mount the staghorn fern to your board with wires
- Water plant to get rid of dirt on board
- Hang the mounted staghorn
If you are not already in the know, you are asking yourself Stag, Who? Stag, What?
But if you’re like me, you know and love the wall adorning staghorn fern!
I first fell in love with the stag horn fern when I was a young boy visiting my Grandmother in San Diego. There was no secrete that I was the plant fanatic in the family. I mean, after all, what young boy asks for plants for his birthday, right?
It was love at first sight
During a summer vacation visit to her house, my grandmother introduced me to one of her friends, a plant-loving neighbor named Nancy.
Nancy was about the same age as my grandmother and lived down the street from her. Her yard was very small but filled with all of her special plant children that she had collected over the years.
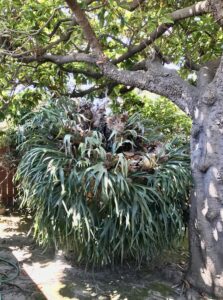
The one plant that stood out to me was the crown jewel (a staghorn fern) hanging above her cascading rock water fountain. I was so taken aback by the staghorn’s amazing wonder and beauty, with the thick, fuzzy, silvery-gray antler-shaped fronds, strongly contrasting its papery thin brown shield frond.
I had literally never seen anything like it before and for me, it was love at first sight!
Ok, So What is a Staghorn Fern?
The staghorn fern (Platycerium bifurcatum) is a semi-tropical epiphytic plant that can be found growing in the rainforests of Southeast Asia, South America, Australia, and parts of Polynesia.
This unique plant gets its name from the deer-like or antler-shaped fronds that grow out of its leafless stem. The antler-shaped leaves are used to capture rainwater and nutrients by directing them down to the roots of the plant. Pretty amazing stuff, right?
I thought we were talking about staghorn, what is an Epiphyte?
These magical ferns are as versatile as they are interesting. They can be grown as an epiphyte, like bromeliads, orchids, or a common air plant. They can also be grown as terrestrial plants like most commonly found potted plants growing in soil or dirt.
Epiphytes are tropical plants that safely grow on other plants or trees in the wild. Epiphytes only use their host plants as a support system while not harming them.
Terrestrial plants are any kind of plant that is naturally grown in the ground or potted in the dirt.
Pro-tip: ferns love water
While these ferns can easily be grown as either epiphytes or terrestrial plants, the one key factor to keep in mind is that they must be kept in moderate humidity or somewhat damp at all times.
I have never seen a fern like this!
The Staghorn fern is in the genus Platycerium of the polypod family (Polypodiaceae) they look nothing like the majority of ferns we are all accustomed to seeing, but they are in the same family (Athyriaceae).
While most ferns have leaves that are divided into leaflets, a staghorn fern’s leaves or fronds are not divided into leaflets.
Two kinds of leaves?
Confused yet? Don’t worry, it’s fairly simple… There are two sets or kinds of fronds for the staghorn fern:
One is the fertile leaves or antler-shaped fronds that grow out of the center of the flat shield or sterile (non-reproductive) basal fronds. The other is the flat shield-shaped fronds are also used as a “shield” to protect the roots or rhizomes that grow underneath.
Speaking of roots
Staghorn ferns also have a different root system than most ferns. Instead of a root ball, they have a hairy rhizome (root system) that is used to attach itself to a host plant or surface and absorb water and nutrients from the air and rain.
In the wild
When a staghorn fern grows in its natural habitat, it attaches itself to tree bark, trunks, and branches using their rhizomes. They can also be found growing on rocks or even hanging from cliffs.
 In cultivation
 In cultivation
They are commonly found growing as either a potted staghorn fern with a somewhat normal-looking root ball, or as living art, mounted on a flat surface like a piece of a tree branch, driftwood, or a wooden board.
How to Care for a Staghorn Fern
The staghorn ferns are slow growers and are easy plants to care for. They require moderate watering and do not require frequent fertilization. It should be placed in an area with bright and indirect light as too much direct sunlight will cause the leaves to turn yellow and brown.
The staghorn fern can be propagated by dividing the clump or by the spores that are found on the underside tips of the antler-shaped leaves.
Note: Not all varieties will form a clump!
Below are some tips on maintaining proper environmental conditions to ensure successful staghorn growth:
- The Staghorn prefers moist soil and high humidity, but it can tolerate low humidity levels if it is kept out of the direct sun and in a well-ventilated area.
- The staghorn fern can also be grown indoors or outdoors. It is semi-frost-tolerant and can safely survive temperatures as low as 40 degrees Fahrenheit.
- When growing a Staghorn fern as an Indoor or patio plant, it will do best if placed in a somewhat humid environment.
Some easy ways to increase the humidity of your space are to add a water fountain, a humidifier, or a misting system near your plants. If these options are unavailable consider misting or spraying them daily with water. Alternatively, if your home or yard is incompatible with these growing conditions, they can also be grown in a well-maintained greenhouse anywhere around the world.
The same conditions are necessary when growing a staghorn as an outdoor plant, it will do best if placed near a fountain, waterfall, or another source of moisture to ensure its success.
Decorating Pro Tip:
An aromatherapy water diffuser is a great way to not only add moisture to the air, which the staghorn will surely appreciate but also a wonderful way to add therapeutic and relaxing scents to your dwelling space. It’s a win-win for sure!
Watering
When watering your staghorn remember it loves moisture and should be kept fairly damp, but not soggy or wet at all times. If the soil is kept too wet, the plant will die of root rot.
A good way to keep track of soil moisture is to stick your finger in the top layer of sheet moss or soil.
- If it feels wet, then don’t water it yet.
- If it feels somewhat dry, then maybe just water it lightly.
- If it is completely bone dry then drench or soak the plant thoroughly in your shower or bathtub.
Fertilizer
Fertilizer is not usually needed for staghorn ferns, but a diluted organic fertilizer can be used once a month if desired. Too much fertilizer will cause the leaves to turn brown and die.
What do you do if you don’t have a lot of space for a large plant?
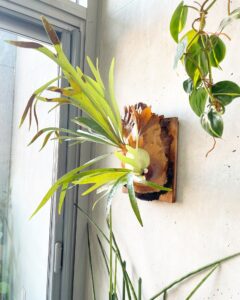
A mounted staghorn is a great choice if you don’t have a lot of floor, counter, or shelf space.
Mounting your staghorn fern as living art or a decorative piece is the perfect solution! Keep reading, in this article, we will walk you through the complete process of mounting your own staghorn fern.
Mounting staghorn ferns: From pot to wall plaque!
Mounting a staghorn fern is a relatively easy process, that can be completed in the following 7 steps.
Part 1: The location
First things first, let’s ensure you have a suitable site for your newly mounted Staghorn Fern to hang. It is essential to select a spot that receives plenty of indirect sunlight, as these ferns need bright light to thrive.
The most ideal place will be one where it can hang a few feet from a bright window or glass door. Once you have selected a location to hang your living art, you will need to determine the size of the board that is needed.
Part 2: Selecting the board
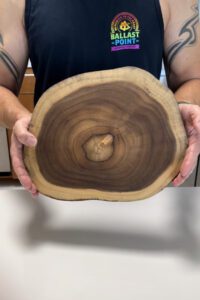
In this step, you will choose a mounting board for your staghorn. Be mindful to choose one that can stay in good condition for many years to come as the staghorn will rely on this board to maintain its steady growth.
I like to use a board that is at least double the width and height of the plant’s original growing container. For example, if you are starting with a four-inch container, consider using a board that is at least 8 to 10 inches in height and width. This will provide your staghorn with enough surface area to make the transition from growing as a terrestrial plant into an epiphytic plant.
Part 3: Prep the board
Let’s prepare the board for a suitable platform for your staghorn. Follow these easy steps:
- Attach a wall hanger, hanging bracket, or piece of wire to the back side of the board so it can easily hang on your wall.
- On the opposite side (the front of the board), use the container that the staghorn came in and place it on the center of the board and trace the circular perimeter of the staghorn pot with a pencil. This will help you mark the central location of where you will place your staghorn on the board.
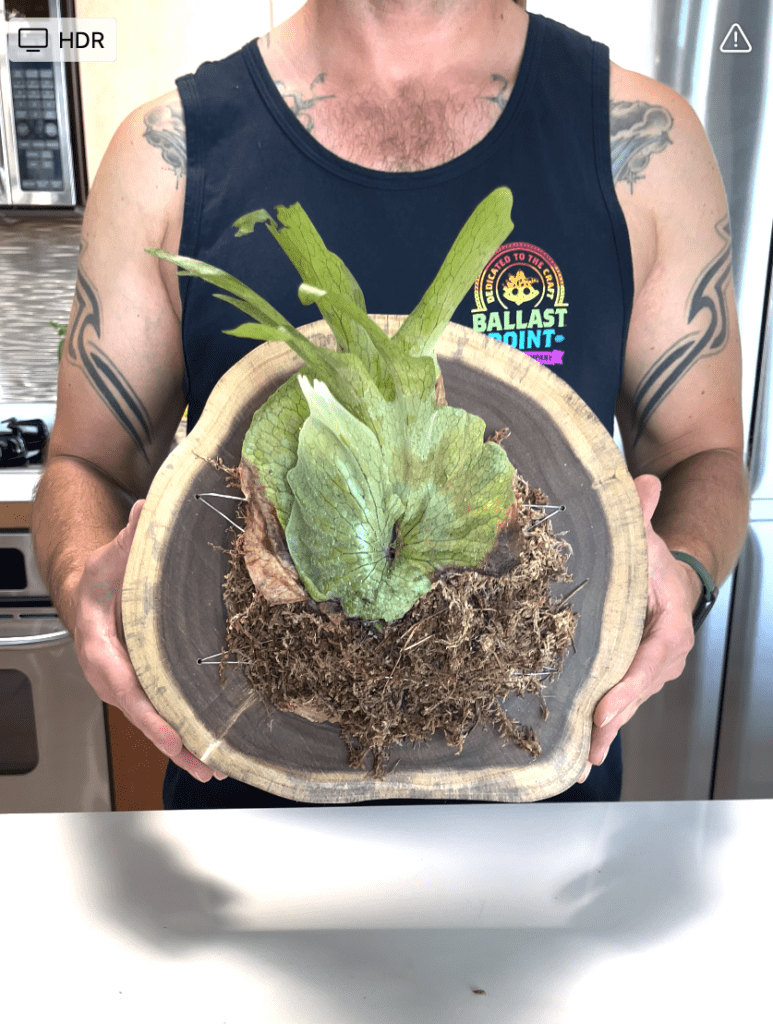
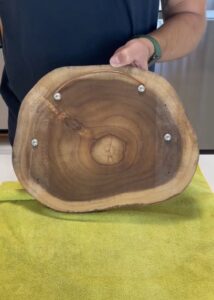
- With your board still facing upward, then drill four holes as pictured above so that a wire or fishing line can be inserted through the holes from the back to the front of the board, and woven over the staghorn.
Part 4: Prep the roots
In this phase, we will be prepping the staghorn plant. Be sure to review the photos as a point of reference for the steps outlined below:
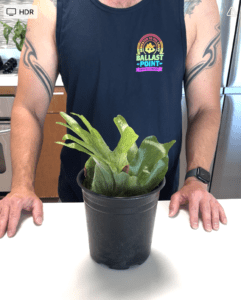
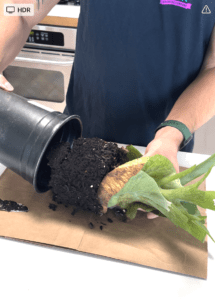
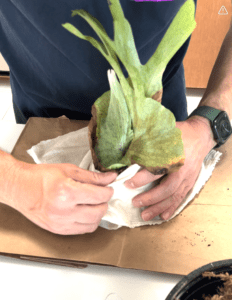
- Gently lift or remove your staghorn from the growing container.
- With your fingers carefully loosen the soil from the rhizome or root ball.
- Wrap the root ball with sphagnum moss, do not cover the shield fronds
- Use cotton cheesecloth or sheet moss to wrap and contain the root ball. If you happen to use the cheesecloth option to wrap the root ball, add another layer of sheet moss and sphagnum moss to cover the cloth.
- Use a fishing line to wrap around and secure the cheesecloth or moss (if you didn’t use the cheesecloth). This will keep everything secured and in place.
Part 5:
For the following step be sure to avoid binding, tearing, or damaging the fronds when mounting a staghorn fern. They are slow growing and the damage will be there for quite some time.
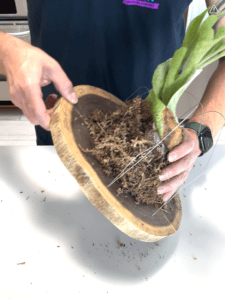
- Use galvanized wire or fishing line to secure the moss-covered root ball to the mounting and start passing them from the back of the board through the drilled holes.
- Wrap your way over the root ball, and back through another drilled hole, and tie the wire to the back of the board as pictured above.
- Ensure proper coverage of the line over the root ball to be sure the moss or the plant itself doesn’t fall off when hanging on the wall.
- Trim off the excess line or wire.
- Secure all the wires on the back with a screw (see picture for reference).
Part 6: Watering
Now that everything is mounted and secure it is time to water.
- Soak the moss and fronds thoroughly the same way you would with air plants.
- Leave everything in the sink or tub so the excess water can drain off completely.
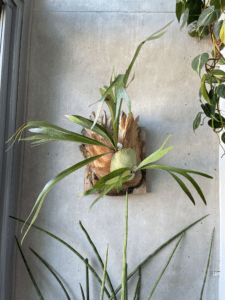
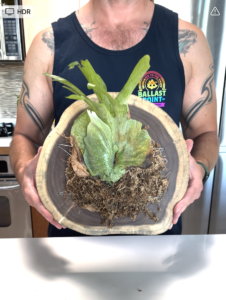
Part 7: Hanging the mounted staghorn fern
Give yourself a round of applause, it is time to hang your mounted stag horn fern!
- Use a stud finder to locate a stable place to hang the mounting.
- Set a nail or screw into the stud on your wall.
- Place mounting on the nail.
I hope you have enjoyed my blog on how to mount a staghorn fern
They are so beautiful and unique, I find they add a touch of organic elegance to any space!
Remember to check in on your new favorite plant from time to time to make sure they are happy in their new home.
Don’t forget to water! Happy Growing!